New Blog

This is an out of date blog, for these posts and all current projects please head over to

I'm Topsy Turvy

for any interest in ordering cakes please head to

topsy turvy cakes
Showing posts with label birthday. Show all posts

April 16, 2010

Flashback Friday- 2nd birthday party

2nd-birthday-party-easter-girl-decoration-set-up-table
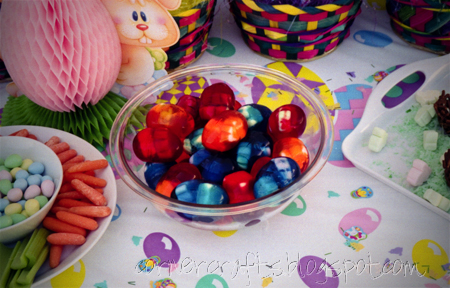
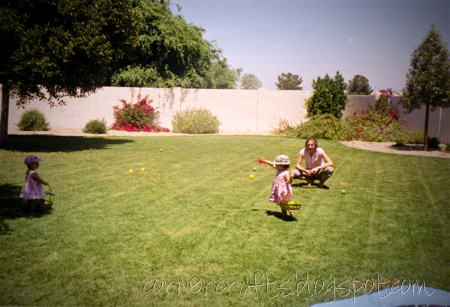
I totally forgot I hadn't filled this out before I set it to automatically update. Anyway. This was my oldest 2nd birthday. Way before I began making cakes. It was her first real party with friends, and that makes it my first real birthday party too! Since my mom, sister and niece were visiting we actually threw this party the month before her birthday, just after Easter, so I picked a spring theme. It was the perfect weather, April in AZ, and we had a great time. An egg hunt, food, a few other games and just a short 1 hour gathering. It really wasn't much, but I was still newish to the area and wanted to get to know the other mom's.
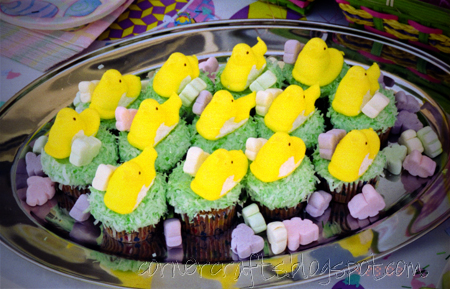
2nd-birthday-party-easter-girl-cupcake-coconut-grass-peeps
Co cupcakes with green coconut grass and peeps.
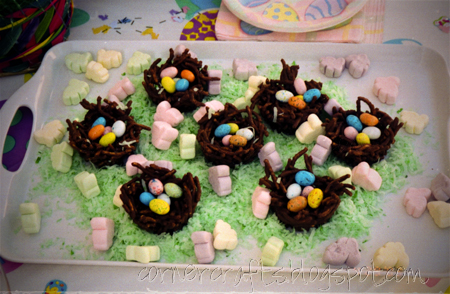
2nd-birthday-party-easter-girl-chocolate-nest-chow-mein-candy-egg
Chow mein nests, with chocolate eggs
2nd-birthday-party-easter-girl-jell-o-gelatin-egg
And jell-o eggs with bunny marshmallows in them.  I used plastic eggs, and it was a major problem.  I now have the jello molds and we still like to make these every year.  This year our holiday boxes are all in storage, but next year.  The kids like to pick what they want to put in the center to surprise the other family members.  It's fun!  The main part of this 2 year old party (most of the guest were even younger) my daughter and neice helped us out with the decorating by putting out all the eggs for us!  It was short, sweet, easy and fun!
2nd-birthday-party-easter-girl-set-up-egg-hunt

April 14, 2010

New wreath color for the party!

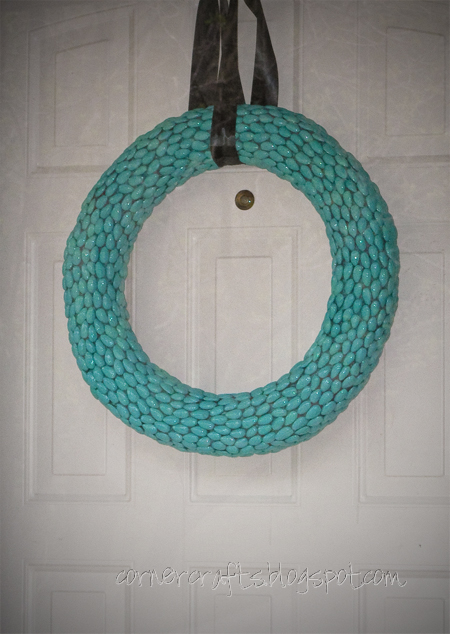
wreath new color teal dr seuss party
The party is still a week and a half away and I'm working on decor right now (in addition to about 300 other things it feels like!) and an easy quick fix was to repaint the acorn wreath!  I'm so excited.  I love planning party's.  I spend week planning and getting excited for something that really only lasts a few hours.  But for me the fun is in the planning.  She's only turning 3, she won't even remember it, but I will and the other kids.  It's also fun that we have so much family around!  We actually have cousins her AGE to invite.  I hope they can all make it!

April 13, 2010

Invitation reveal~

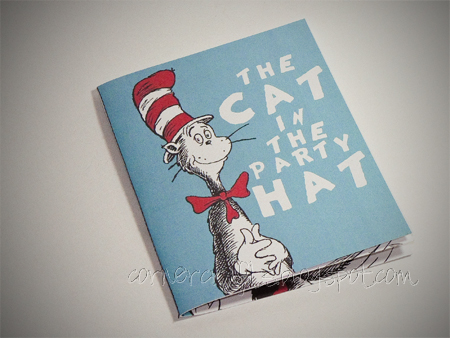
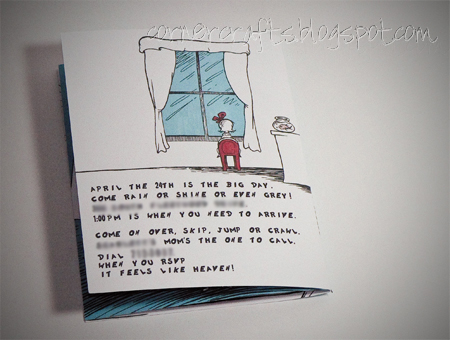
dr seuss birthday party invitation book front page
So I got the idea for a book from this blogger, Michelle and she ordered and designed them with/from Cassandra on Etsy.    Anyway, I took the idea of a book and ran with it.  Of course I wrote my own story.  So I bought blank cards from a scrapbooking section.  That was a BIG mistake!  They weren't sized properly for my printer and even the custom setting didn't work!  It was a major pain but in the end I worked it out.  Next time I'll buy the printer friendly blank cards!
To design the cards I used Publisher.  I have to say I LOVE publisher.  I publish a family newsletter every 4 months on it, do my business cards, labels, stickers, Christmas cards etc...  All on publisher.  I also use Photoshop for a lot of projects, but publisher is easier to use for some projects.  I print all my envelopes with publisher too, using a homemade address book from excel.
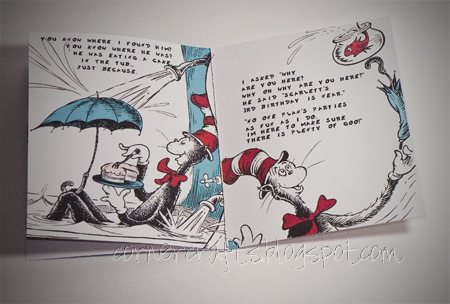
dr seuss birthday party invitation book 4th page
When they were done printing I put the two cards together, so it's 8 front and back pages.  I wanted them to stay together so I used a sewing machine to sew them together.  It was easy, fast and fun!  The back page had all the information on the party.  They turned out even BETTER than I'd hoped.  AND they were still light enough that they only took one stamp!  I am SOOO exciting for this party, it's coming together really well!
dr seuss party invitation back page

April 11, 2010

Party invite

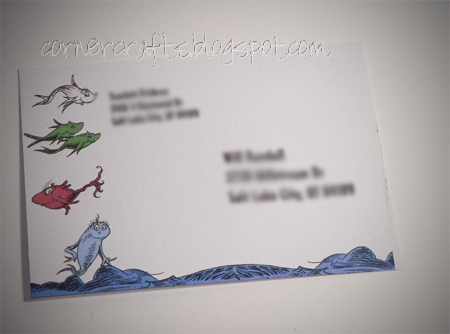
dr seuss birthday party invitations enveope
So I've been a little MIA on posting the last few days. It's not that I'm not crafting, I AM! It's just that I can't really share most of it yet. You see it's all for the big birthday bash I'm throwing my youngest in 2 weeks. SO I'll try to remember to post little tastes of it... After 4 straight days, and over a two dozen problems I FINALLY finished the cute invites and they are in envelopes and ready to mail!
I made the envelopes in Publisher. If you don't have Publisher you SHOULD! My copy is from back in 2003, but I LOVE it. I get Microsoft Office for Publisher alone. I use it all the time, stickers, Invitations, Christmas cards, family newsletters, business cards, etc...
Anywho I'll try to be better about posting, but I don't want to give too much of the party away until I'm ready to reveal it all. I am hoping to get the blog's merged this week AND to celebrate my baby girl and the merge I'll be having a giveaway. So keep checking back!

February 22, 2010

Happy Birthday Mom!

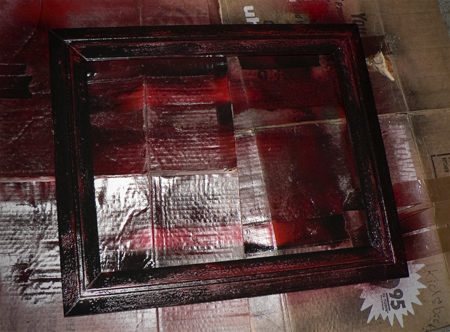
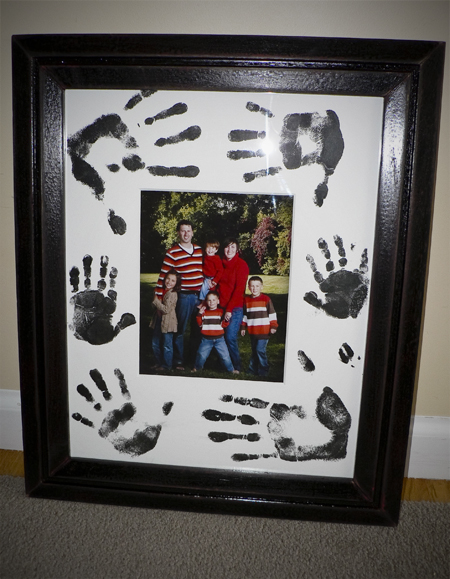
Today is my Mom's birthday. When I was visiting last week I noticed that my sister had given her a family picture with hand prints on the mat. SO cute. So when I got home I thought it would make a great gift, so I totally copied it!  I went out and found a frame at DI and repainted it.  It took forever because for some reason, I think it's the cold weather, the paint was curdling (best way to describe it).  I sanded it down between each layer, and ended up painting it 4 times (one red, 3 black).  Then I sanded down the edges for a rough look with a bit of the red showing through.  It still wasn't perfect but I was pleased with it in the end.
black paint over red frame mess
For the hand prints we tried both paint and a stamp pad out on some scrap paper.  We went with the paint in the end.  It was a more true black.  Although my 2 1/2 year old moved her pinky so it looks like she has 6 fingers!  We even got George's (our pet pig) hoof print on the mat.  So now Mom has 2 out of 3 (Chelsea, your turn!).  Happy Birthday Mom!
hand print family picture frame mat gift handprint

January 16, 2010

What was it??? A Pinata!

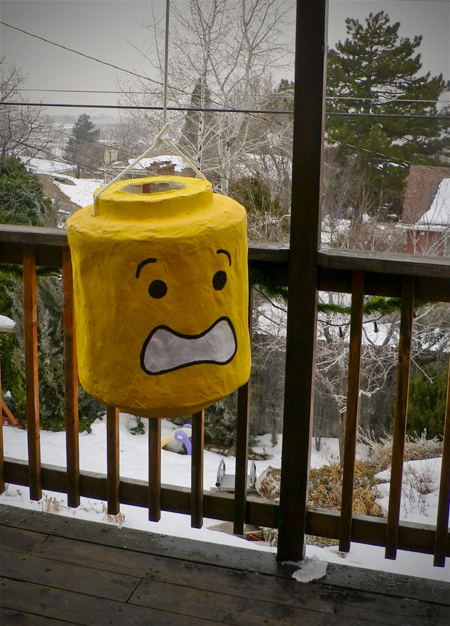
But of what?  A Lego head!  I got this idea and pattern from Manic Mommies, but I wasn't able to find all the Styrofoam shapes and sizes so mine doesn't look quite the same.  First I had to paint it, white and then Yellow, leaving the mouth white.  I wanted him to look a little scared...
lego pinata painting birthday
So I picked this face from the Lego head images I found.  And it's finished!  It was quite the sturdy pinata, out of all the one's I've made (I try to do one for each kids parties) it took the longest to break.  Each kid got three tries before it finally broke!  It would have been nice if it wasn't quite so sturdy since quite a bit of the candy was pretty beat up by the time it broke, but I'll take cute over breakable any day! 
lego head pinata homemade birthday

Photobucket

January 15, 2010

Lego Crayons

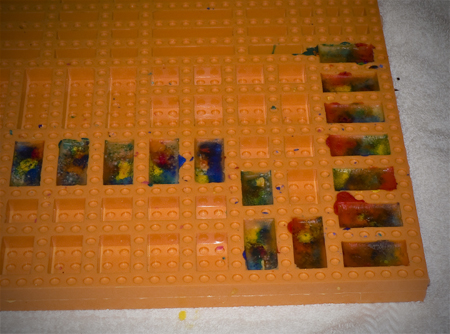
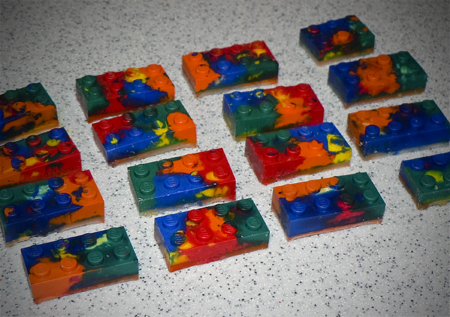
One final use of the Lego mold for this party (I might think of some others for our next Lego party, I have 2 boys) is melting broken crayons for the gift bags.  I've read about how easy it was, but hadn't tried it before.  It worked like a charm!  7 mins at 300 degrees and this is what we got!
silicone lego mold crayons melting
After letting them cool they un-molded great.  They are shorter than the other stuff I made because I couldn't fully fill them, but they color and that's the best part!  Although it was much harder to clean the mold from the crayons than any of the candies were.  I had to really scrub it off.  Because I want the mold to stay food safe I'm not sure if I'll use it for crayons again without a bit more research. 
homemade lego crayons birthday gifts

Photobucket

Lego Candy Melts

So I decided to try one more thing, Candy melts. But they broke when I pulled them out so I didn't make any others.  I think if I used better melts (these were wilton) it would work better?  I don't really like the flavor of candy melts so I don't work with them very often, so I don't know how to best work with them.  Anyone out there have better advice? 
candy melts lego mold
Anyway, they were a hit, and the kids loved them so I wish I had made a few more! 
Photobucket

What in the world???

That's what my husband said when he saw this:
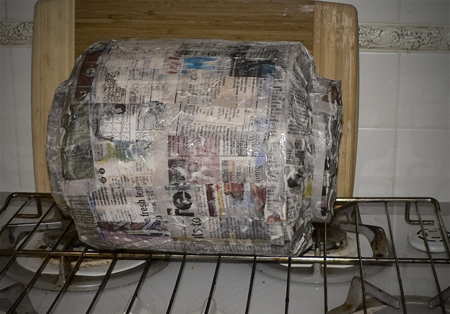
lego head pinata paper mache
Any ideas what it might be? Hint: it's for the birthday party!

Photobucket

Lego suckers???

So today I attempted to make Lego suckers. I ended up with plain hard candy. But it didn't go as smoothly as the gummie's did. Here is the recipe I went with
1 cup sugar
1/2 cup water
1/3 light corn syrup
1/2-1 1/2 teaspoons flavoring
Food coloring
Mix all the ingredients together in a saucepan. Cook it over med-high heat, stir until all the sugar is dissolved. Boil until it reaches the hard-crack stage, which is about 300 degree on a candy thermometer. Remove from heat and add food coloring slowly, then add the flavoring. Pour slowly into the molds. Don't worry about any bubbles, they'll go away on their own.
It went totally smooth until it came to the part to put the flavor in. I went with the wrong one! My son smelled them all and picked Cinnamon, so I picked up the red bottle and poured it in. But it was CHERRY! Ewwwwww Then we poured it into the mold.
lego mold hard candy sucker
I thought the gummie's thickened quickly. These suckers started going hard so fast I couldn't even spread it around very well. Then the sticks wouldn't stay in the big suckers and I couldn't get the base plate to stick into it (too hard by the time I tried, so they can't stack. Oh well, live and learn. It was fun to try and fairly simple, now that I know what NOT to do, I think we'll end up trying it again soon!
Photobucket

January 13, 2010

Lego Gummie's

Today we used the mold to make 4 different batches of gummy Lego's for the party.  It was SO easy and fun.  You just take a small sized jello, mix it with 6 packets of unflavored gelatin and add 3/4 C water. Then boil it (stirring the whole time) and pour it in once it's clear!
lego mold gummies candy
I tried using and plunger and doing just one at a time, but it started to thicken and harden before I could finish so with the next batches I just poured it in and spread it around.  Then using a rolling pin I rolled the large base plate over the top so they have bottom wells so they can stack!  Ten throw it into the freezer for 15 mins and then unpeel!  The kids loved helping AND they taste great too!  I couldn't believe it actually worked so well.
lego mold candy gummies

Photobucket

January 12, 2010

Lego Mold

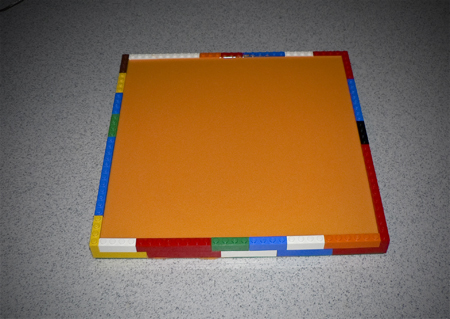
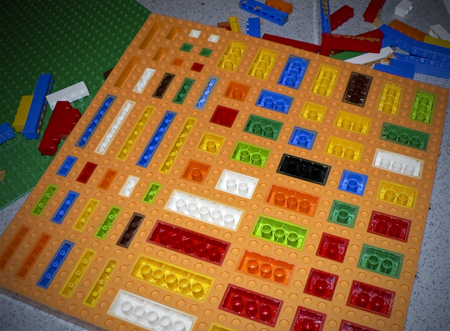
I saw this idea at Instructables and fell in love.  I've been wanting to do this for my kids and my son's birthday theme was the perfect time!  So first you make your 2 story wall around whatever space you want. I went big, but I usually do.  Then fill it in with all the shapes you are interested in using keeping them just one dot apart each.  You don't want to waste space by leaving them too far apart. 
lego prep mold set up
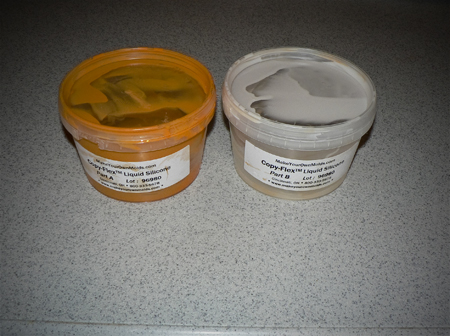
Next take these, I got my food grade silicone here, I used the copy flex so I could pour it into my lego's.  I think I'll order some of the silicone plastique for my cake decorating.  It was just SO much fun!.  So you mix equal parts of the two together. 
food grade silicone
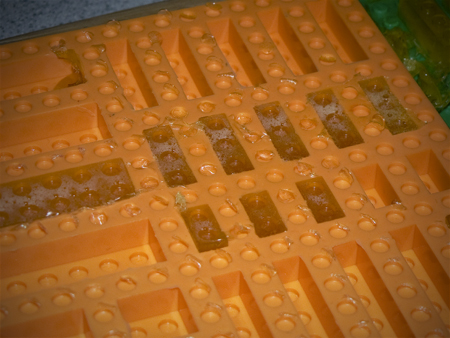
And pour it in.  I ended up using 2 full pounds to fill in my huge board! It says it only takes 4 hours to cure, but it was still tacky on the back, so I just left it overnight!
Lego food grade silicone mold setting
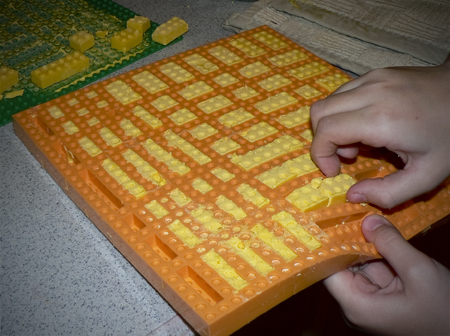
Then peel off the silicone and there you go.  The Lego's that remained in the mold popped RIGHT out.  I let my 2 year old and 4 year old help with that part.  They loved it, and I have to say I did too, there is something SO fun about peeling the Lego's out of this thing.  Since the plastic is food grade there is SO many things you can do with it.  Watch over the next few entries as I talk about all the different things I made using my new mold!
lego mold done

Photobucket

January 11, 2010

Lego Invitation

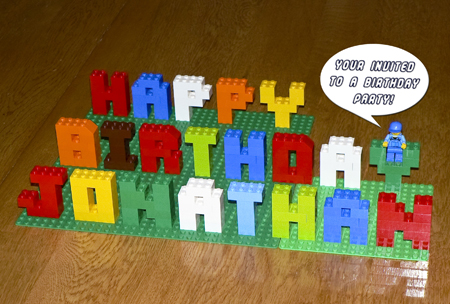
It's my first son's 7th birthday today. This Saturday we're having a party for him. When I asked him what kind of party he wanted he said "Lego". This is actually the first year we've owned lego's! I've always had a baby around and it was never safe. But since we're on a baby break it seemed like the perfect time! So for Christmas my 2nd Son got quite a few lego's to start off the collection. They have both been having a great time. So that's the theme! Here is part of the invitation I sent out. The day/time/address and stuff was off on the side, but here is the image I used. I put this "Happy Birthday Jonathan" together late at night and he woke up to it. He loved it. And it turned out pretty cute I think!
lego party invitation

Photobucket