New Blog

This is an out of date blog, for these posts and all current projects please head over to

I'm Topsy Turvy

for any interest in ordering cakes please head to

topsy turvy cakes
Showing posts with label crafts. Show all posts

April 20, 2010

Flower Bow

fabric flower hair clips denim bandana
So last night my sister emailed me with a picture of this cute toddler flower bow she found. BUT she didn't want to buy it if she could make it. So she asked if I, being the Origami QUEEN, could figure out how it was made. Now I have a to do list longer than my husbands monkey arms (his arms are longer then his height, unusual I think) for the party. BUT she piqued my interest. SO I started working on it... It was fun and I spent WAY to long on it, BUT I figured it out! What do you think?  I took a sheet of paper and kept folding it until I got all the folds the picture of the flower clip had.  Then I cut off the excess paper.  Then unfolded it to find a... square!  yup each petal is made from a square of fabric.  I used 4 inch squares for this clip, but think I'll try a 3 inch square for one for Little S.
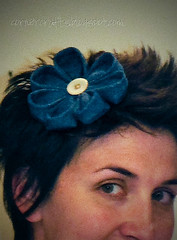
fabric denim headband hair clip
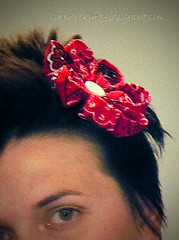
Sorry for the bad picture quality, this is the bathroom mirror and there is NO natural light in that room.   But I thought a picture would help with the size.  I love having short hair, but don't usually find anything I can wear in my hair.  These were perfect!  I'm LOVING them SOMEDAY I'll get someone else to take a picture I like. But for now, here they are (and my new hairdo~!) I have a photographer girlfriend who I'm GOING to get together with someday and get new headshots!

The sewing was actually easy.  But showing you how to fold it is a bit harder.  I'll TRY... Here it goes.

Okay start with a square of fabric.  I was trying different fabric options when I made this.  I took pictures of the Jersey, but it didn't work out right.  I want something thicker than the cotton, but not as heavy as the jersey, any suggestions?  Okay, I used a 5 in square for these pictures, but 4 inches for the ones in my hair and will use 3 inch's for the one for my toddler.
flower petal big hair clip fabric square
First step...  Fold it over with the right sides out, super easy!
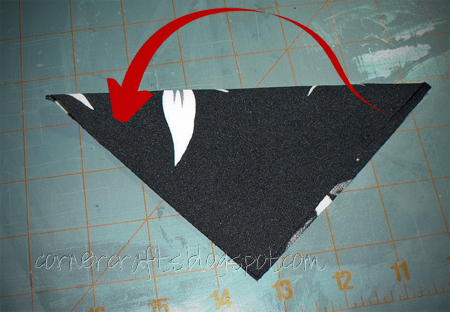
flower petal big hair clip fabric square fold triangle
Then fold it in half again, pin the raw edges and sew up the line
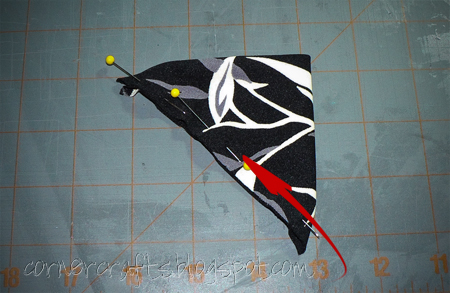
flower petal big hair clip fabric square fold triangle again pin
Doesn't that look nice?  Now were going to OPEN up the triangle.
This part is hard to explain, but the open side is going to open into a triangle and the folded side is going to meet up with the sewn edge. you want the invisible green lines to match up!
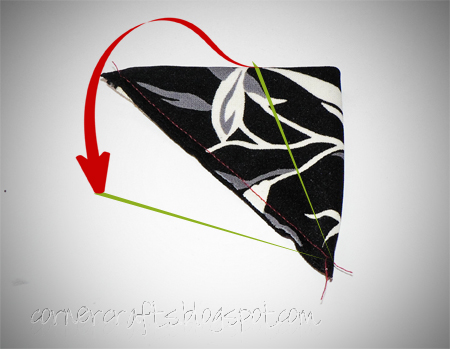
flower petal big hair clip fabric sewn
It should look like an elongated kite.  The raw edges underneath.  Next we're going to take the top raw edge/point and fold it backwards pulling it down until it meets the bottom raw edge/point.
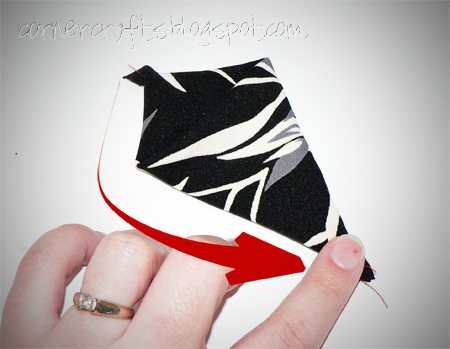
flower petal big hair clip fabric sewn fold
It should look like this with the raw edges touching in the middle of all the other layers.  Now we're going to fold up the outer sides and this will create our petal look.
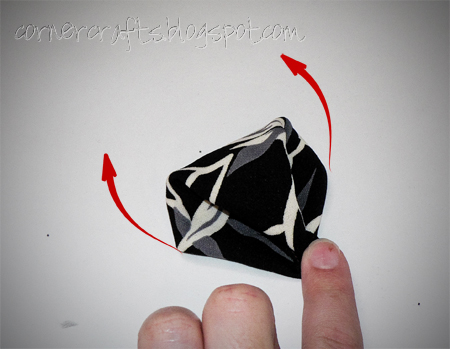
flower petal big hair clip fabric sewn folding
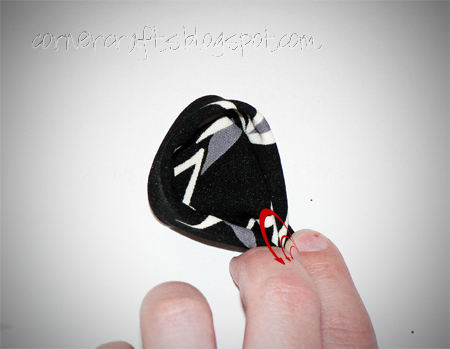
Voila!  Last fold the edges in as much as you can down at the point, sew it together and your done!   Make 7 of these putting them together to create  a flower.  Use a button on the top to cover the nasty point/edge and add to whatever you'd like,  barrette, clip, headband etc...!
flower petal big hair clip fabric sewn done
I used jersey, cotton, and denim. the jersey is OUT, the other two are okay. The thicker denim is nicer than the cotton hancerchief but I'm not completely sold on either.  The search in on for the right material for this project!  Let me know what you think, and if you make one (or make it BETTER) I'd love to see it!
red bandana hair clip fabric


I'm linking up to:
DIY daySomething I just whipped up MondayMade by you MondayMade by me MondayLucky link TuesdayTrash to treasure TuesdayToot your horn TuesdayTalented TuesdayGet your craft onTip me TuesdayCraftaholics anonymous support groupShow us what your workin' withPinching penny partyCreative Therapy session, We did it Wednesday, Make it yours day, show and tell, show and share, strut your stuff, Under $100, get your craft on, Transformation Thursday, show off your stuff

April 14, 2010

Don't take a shower when you have kids

I love my kids. The only thing I have missed since having kids is a daily shower. Maybe it's just my kids, but today I proved again that showers and kids are a bad idea. My older two were at school so it was only the younger two at home. Of course the youngest, S, is the MOST destructive of the 4 kids.  For some reason ages 3 to 4 1/2 is the most difficult for me.  Mostly because of the destructive nature at that age.  They've been the most expensive ages of all for us.  Flooding, drawing on walls, destroying clothes, books, floors, carpet, furniture etc..  These 18 months are the reason we won't pay for our kids college. We've already done our part.  ANYWAY.  Showers and kids.  So this morning when I got out of a shower (at most 10 mins) this is what I found:
Mayo mess daughter mayonnaise
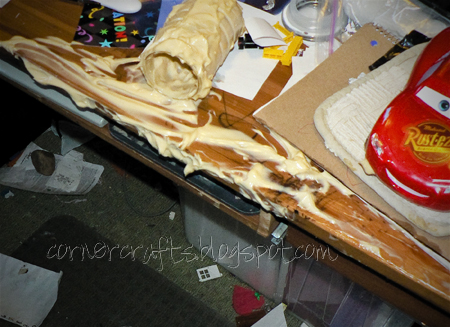
That is Mayonnaise.  Yup, an entire brand new jar.  And that's not all.  We have a food storage room in the basement that is SUPPOSED to be locked 24/7.  Apparently someone (no one has claimed it yet) left it opened and S got into it.  Not only was there Mayo all over the desk but the chair, floor, shelf and even the Pig!   Also a box of brownie mix opened and poured out, and an entire skein of yarn unwound and wrapped all over the entire downstairs.  Like Parent trap!  I was also keeping the stuff I'd finished for the party in that room.  GONE!  All the paper I got to cover the walls for the party destroyed and the picture frames I just finished painted strewn all over and scratched, you get the idea.  The 4 year old?  He just spilled some Lego's, nothing in comparison!
This is a prime example of why we call our kids D.A.'s at this age.  My folks started it when my baby sister was young and my kids have inherited the title, each in their own time.  It stands for: Destroying Angel!  They can Destroy the house worse than a hurricane (I should know, we had a tree go through the roof during Hurricane Ike in Houston), but they are still sweet, adorable, Angelic beings at the same time.  So our D.A.'s!  This is the same child who did THIS.  Point proven!  Anyway.  I guess I'll have to take showers at night or wake up earlier...  HA, wake up earlier, good one.  Have I mentioned I'm practically a vampire?  I'm beyond night owl, night it is.  
mayo mayonnnaise paper yarn skein mess destryoed

April 5, 2010

Question?

So I have this blog that I just started in January, I have a cake/food blog that I started back in 2007, AND I have a private personal blog with all the fun stuff about my kids and day to day life.  That's a lot of blogs.  When I started looking around at craft blogs I decided to start a new blog and keep my crafts and food's separate.  But now I'm questioning that decision.

Background:  My husband is supposed to be starting a PHD program in the fall, but we're worried about funds.  So I've been trying to build up my cake business as well as an etsy store to try to support our family over the next 5 years until he's done and has a job somewhere.  But it's not working and it looks like I might have to go get a "real" job in addition to parenting our 4 asperger children.

Posting on both blogs, trying to get followers for both, and working on selling stuff on Etsy as well as my wedding/birthday cakes is actually lots of fun.  But when I'm crafting my food blog is suffering, when I'm cooking my crafts are suffering.  SOOOOOOO  the whole point of this point.  Do you think it's better to have the food and crafts separate, or would it be okay to merge the two blogs and have crafts and food/cakes, on the same blog?

Edited to add: any suggestions for a name if I put them together?  Stick with Corner Crafts, or Bittersweet Cake shop or mix the two to be Bittersweet Craft Shop ORRRR  Something totally new???

March 29, 2010

Glass Jars finished!

chalk paint labels organization jars
I finally got around to painting these jars.  Actually I did it about a week ago, but didn't have any chalk.  So I finally got chalk and finished them by rubbing the chalk all over them and wiping them clean.  Finally I got to write on the jars.  Of course I have TERRIBLE handwriting so don't look TOO closely.  My Husband thinks this is silly.  Since the Jar's are clear no reason to label and write on them he said...  He just doesn't get it!  But I'm happy with how they turned out and even collecting some more jars!
glass jars labeled finished paint chalk

March 18, 2010

Recycling and organization!

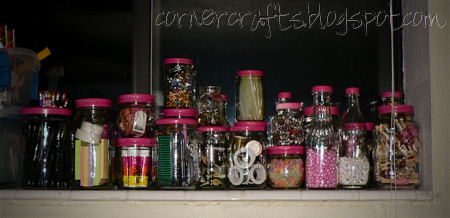
I saw this post at Not so Idle Hands and loved the idea.  I have quite a few glass jars lying around.  But I don't need them for my kitchen.  No way, I go through WAY more flour in a day than any of these jars could hold.  BUT remember my corner?  Full of wall to wall, floor to ceiling boxes?  Sometimes it's frustrating digging through and moving all those boxes for something relatively small.  Or something I use a lot, but is in a heavy box and therefore on the bottom.  So I thought this project could solve the problem for me!
glass jar lids organization
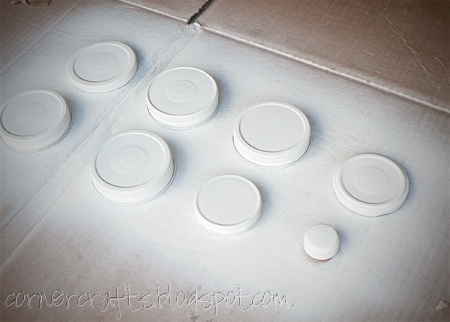
So I took the lids and layed them out, using a spray can metal primer.
glass jar lids prime
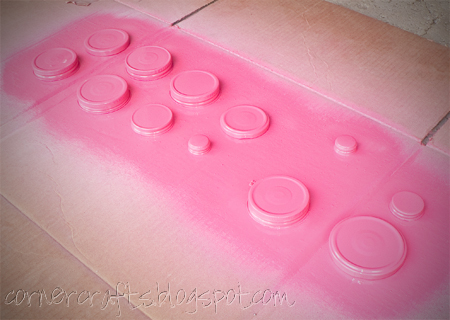
Now I loved the metallic grey she used, but my corner really needs some color.  So I grabbed the Pink!  I know it's not really a grown up color, but what can I say, I love pink, almost as much as I love red.  Maybe I'll change it up someday if I get sick of pink, but for now it's a great spring color.   And considering we're still getting snow I need a pick me up!
glass jar lids painted pink
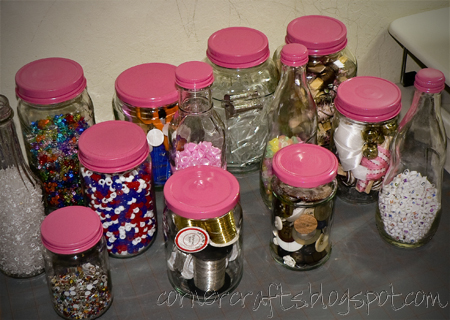
Then filled the jars and popped on the lids!  You can see what I started organizing, ribbons, beads (for socks)wire, buttons, glass tiles (for an upcoming project), etc...  Perfect...
glass jars painted lids organization crafts
Then I went by DI and found a WHOLE lot more jars!   Now I have my glue sticks, pens, pencils, erasers, dremel bits, scratch pad, tape, thumbtacks and more right at my fingertips!  Now I just have to close the shade and hope my almost 3 year old doesn't get too curious until I can find a slightly more out of reach place (right now she'll have to climb on a chair, then table to reach them, but I'm sure she won't mind...).  This is my version of spring "cleaning".  I would like to put labels on them, but rather than etch I think I'll add some chalkboard paint so I can move the insides around still!
organization craft supplies pink painted lids glass jars

March 9, 2010

The PAIN of crafting!

crafting blisters book wreath spray paint hanger
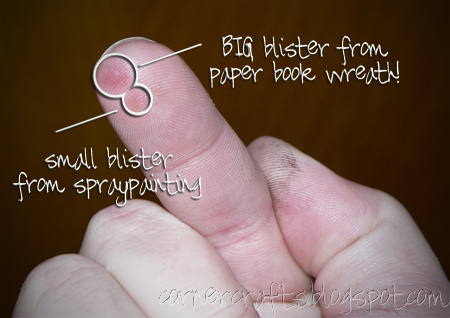
While I was working on my last few crafts my finger started to hurt~  I wasn't surprised by the big blister on my finger tip.  Pushing a hanger through 8 sheets of paper over and over and over again hundreds of time is bound to bring on a blister.  I guess that's what thimbles are for, but I'm not really a thimble girl.  But the smaller blister?  Who knew that just using a spray paint can could create a blister!  Granted I used it quite a bit on the mirror frame and wording, but still???

March 8, 2010

Book pages wreath

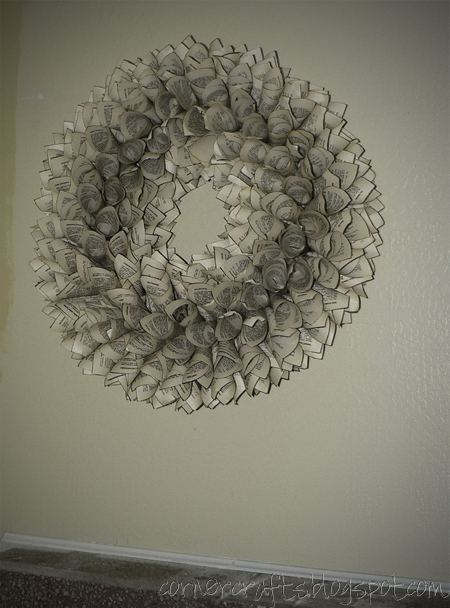
I've been loving all the new craft blogs I've discovered and started following.  What great ideas and inspiration.  I have no idea who started this!  But it's all over the place!  So easy too, especially since I had everything I needed at my fingertips!
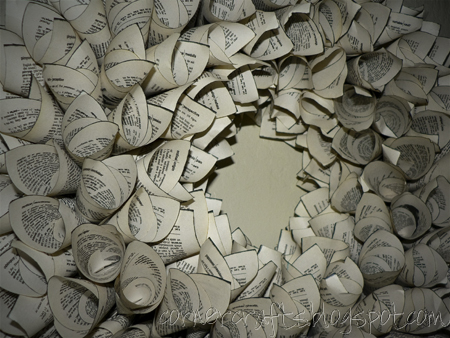
book wreath finished

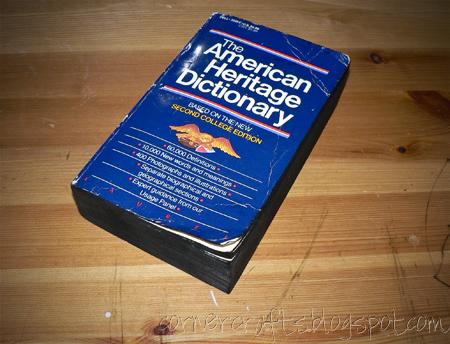
Book?  Check.  I had this old dictionary lying around.  Really with the internet who needs a dictionary?  AnywayI used my black stamp ink pad I blacked the outside edges. 
book wreath stamp blacken edges
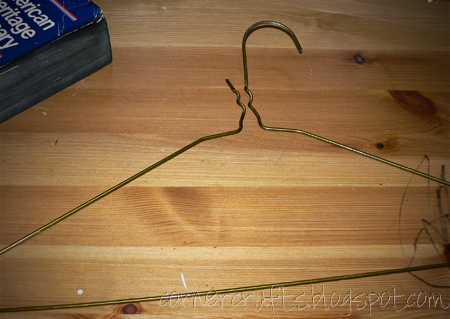
Hanger?  Check.  This was actually a surprise because I hate these wire hangers and thought I threw them all away.  I'll have to remember to hang onto a few because I have a few other craft projects that need wire hangers.
book wreath hanger

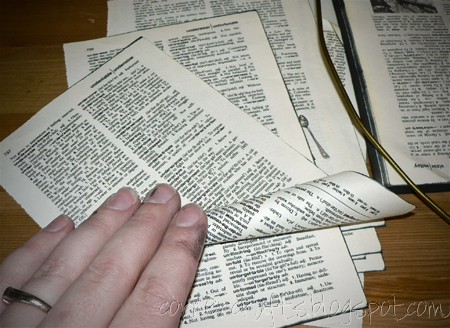
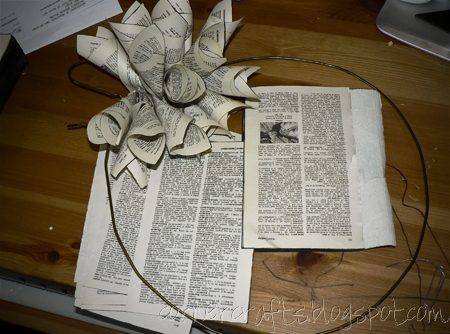
I was looking at the many different wreaths.  Folded paper, accordion style paper and rolled paper.  I decided I liked the rolled style the best.  So I start by rolling each page...
book wreath rolling paper

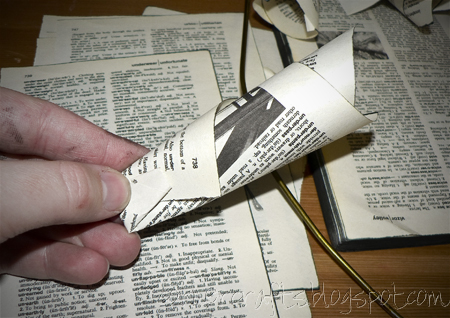
Then I fold up the bottom.  One to keep the point from getting in the way on the other side, but also to thicken up the base of the roll to keep it secure on the wire and keep the pages from sliding around on the wire wreath.
book wreath rolled folded paper

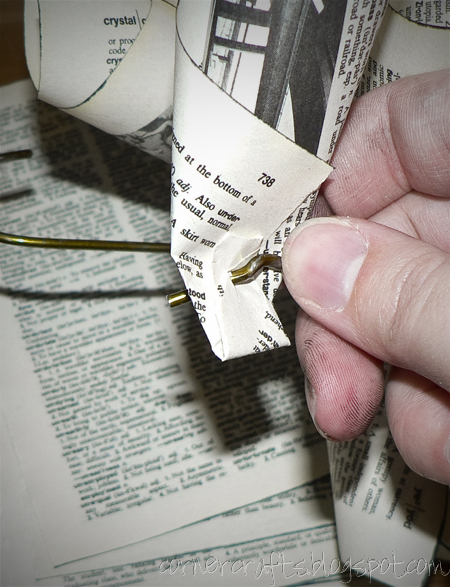
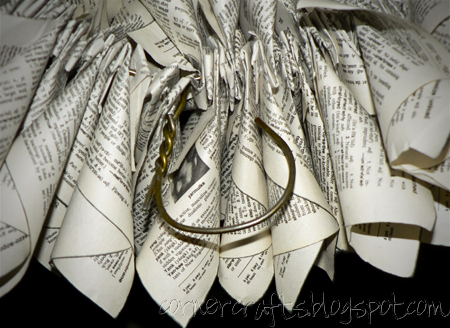
Stick the hanger though the papers.  I actually used a paperclip to start a hole, but a thumb tack would work well too.  I have a blister on the tip of my pointer finger from pushing the paperclip through the 6 layers of paper!
book wreath hanger punching through paper

Slide  it around to the other side.  Keep going until...
book wreath started

You get back around to the other side.  Re-hook the hanger closed and then I bent down the hook so it didn't stick out above the paper rolls.
book wreath hanger bent finished

Finally hang it on the wall!  Back to my same old same old problem.  My lack of space in our half of my in-law's basement!  But I found an empty wall.  It's not the best place, simply because I can't see the wall, it's around the corner from the main living room, but it's up.  Someday I'll once again have my own space and can find a great place for it.  Most walls have low hanging vents from the heating system and I didn't want to risk hanging it low enough for my kids to destroy it.  It would take them less than a second I think!  Luckily I still have about half the dictionary left, so I can either make a gift for someone or fix mine if my kids find a way to reach it!  Anyway, I LOVE it!
book wreath finishesd hanging

March 1, 2010

Nuts for St Patrick's day! #69 Seasonal wreaths

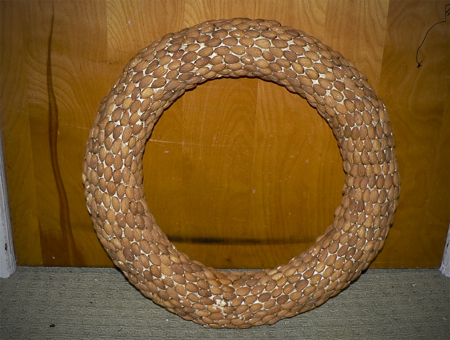
I, like many others, saw this wreath that Dana made and fell in love with it.  Since most of us don't have access to so many and such pretty acorns all us fan's have used other nut's and items.  Here and here are some examples.  So I started looking around for what I might use.  I thought the beads were a great idea because you don't have to worry about them rotting.  But I couldn't find the same beads easily and I was at Costco and saw their huge bag of Almonds and thought it might work out well. 
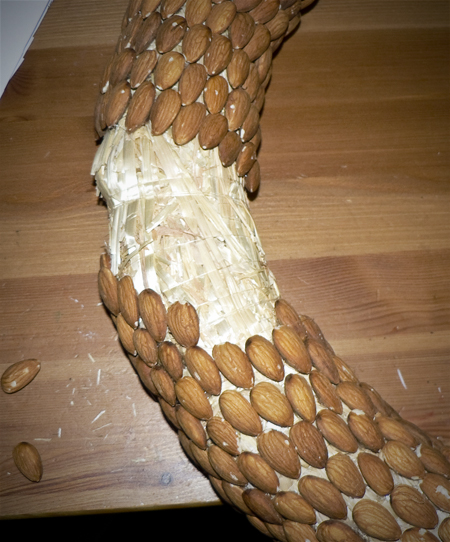
almond wreath super glue project
The wreath I found at DI for $1 so I was ready to go.  I went with 18 inch, even though it's too big for the doors here I want to make sure it's big enough for where ever we live next.  I set about hot gluing the almonds to the wreath!  I have a pretty cool hot glue gun so not burns, but at the same time they didn't stick as well.  I'm still nervous they'll fall off too easily.  When I put the wreath down to take a picture of it George, our micro mini pot bellied piglet, started eating on the bottom nuts!  I had to put him in his room to get the shot.
almond nut wreath finished
I knew I was going to go with a dark color to start off, and I could have just painted it right away, but I wanted to prime it first hoping it would help seal it a bit before starting.  So here it is primed (I think I'll do what Dana does and keep changing the color to match the season, so I'll use the primer again). 
almond nut wreath primer paint
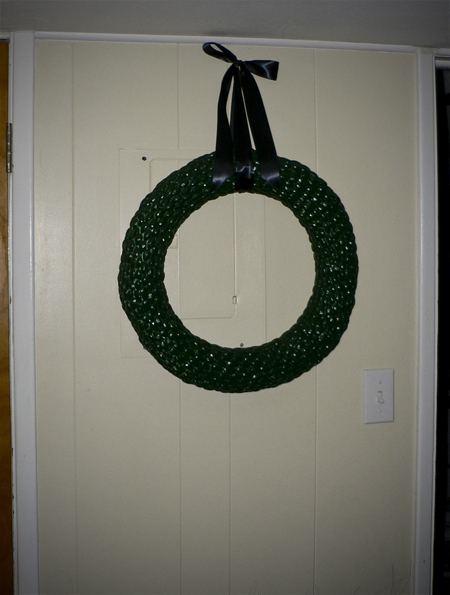
Finally I went with a dark green for St. Patrick's day!  I'm running out of space in our half of the basement and don't have a good door to place it on where it won't get hurt by the kids.  Plus with our low ceilings it hangs WAY too low.  So I put a nail up at the top of the wall (only a few inches higher than my head) and hung it there.  With the panel behind it's pretty ugly.  I'm still hoping to find a better spot for it.  If only I had a front door!!!
almond wreath painted st patricks day ribbon hanging finished

February 28, 2010

Frosted Glass Mirror! #71 "etch" some kind of glass

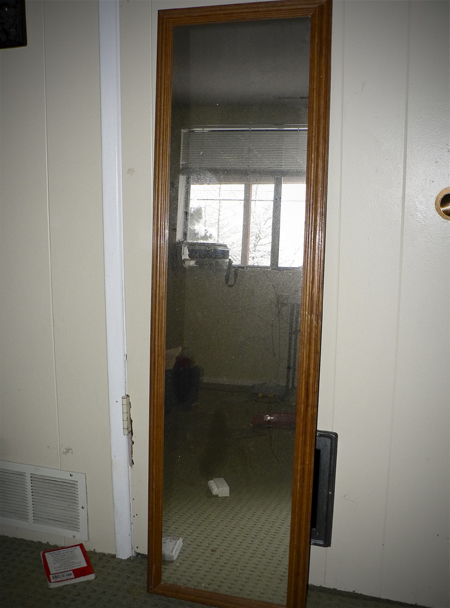
I was actually inspired by Roadkill Rescue at Infarrantly Creative.  I read her post and really wanted to win the prize, I thought what do I have that I got for free that I can re-make?  And I remembered this mirror that my sister in law was going to give to DI and my husband rescued thinking I'd like it.  I actually didn't get it done in time, I missed it by a day.  But maybe next time. 
old mirror roadkill rescue
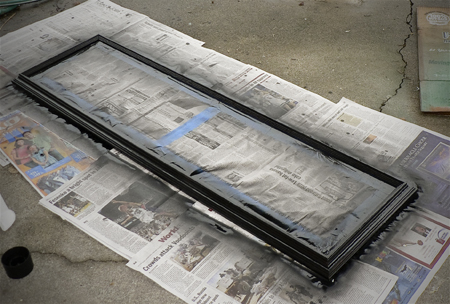
First I taped off the mirror and spray painted the frame black.  Then distressed it a bit.  I'd like to rub a dark gloss onto it, but don't have one available.  When I get some I'll go back and finish off the frame. 
old mirror paint
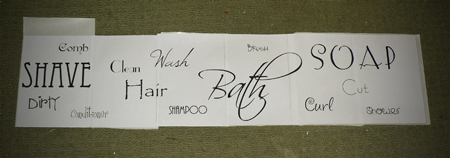
I don't have a vinyl cutter, or a Cricut, so I planned out the mirror words and printed them off on paper. I ran them through my Xyron machine to turn then into stickers and stuck them together.  I couldn't find my sharp craft scissors so I had to use normal ones.  I cut out all the large words, but without the super small and sharp ones that was the best I could do, still trying to get it done in one day. 
words bathroom mirror
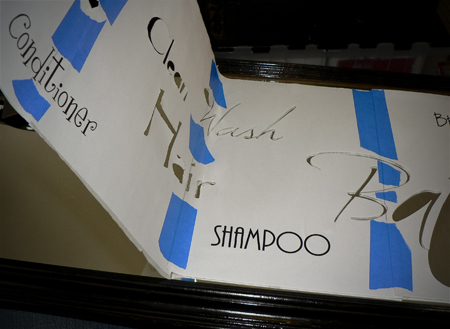
I used bathroom related words and changed fonts and sizes for every word.  After cutting out what I could I took off the backing and stuck it to the mirror.  You can see the smaller words that didn't get cut out.  I'm hoping to go back and re print and cut out those words later.  I used bathroom related words and changed fonts and sizes for every word. 
words cut out sticker mirror stencil
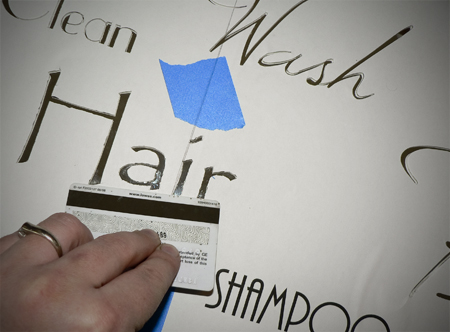
Then I pressed the sticker/paper to the mirror using a credit card, just like you would do with a vinyl stencil.  I didn't want any bubbles that the etching could get through and mess up the words. 
mirro stencil sticker cut out bathroom words
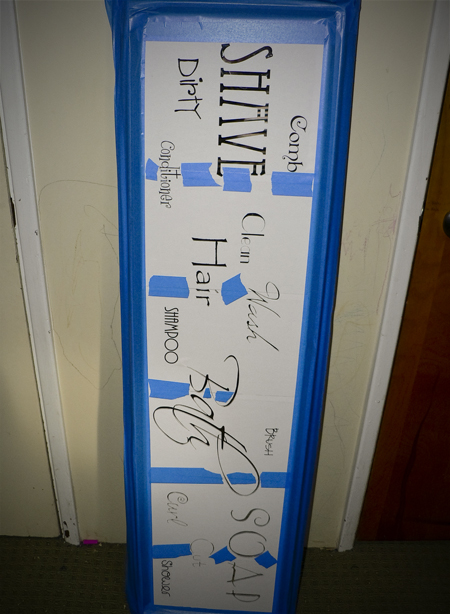
I taped off every part of the frame so the etching couldn't get through. 
mirror frame preperation
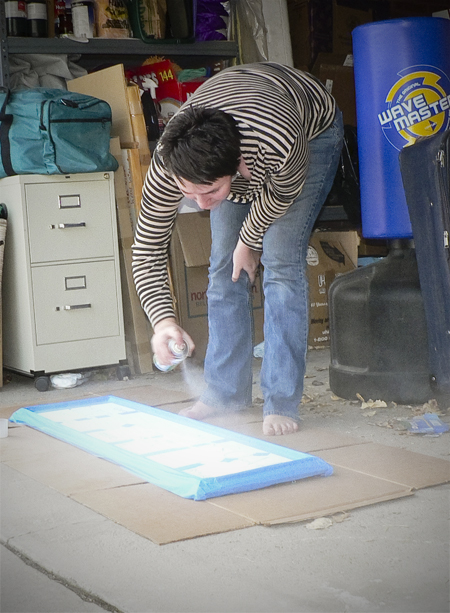
And instead of using etching cream I discovered and fell in love with this great new product.  Frosted Glass in a spray can!  Crazy easy, looks just like etched glass AND the best part if I don't like it later I can clean off the "frosted glass" and do something else!  I'm counting it as #71 because what I wanted from this goal was something that looked like this, not necessarily having to use the cream to get it.  Yup a rare picture of me.  Gotta love pictures taken by kids that you find on your camera later.  Like the new cut?  Not that you can see it.  I'll try to remember to take a new picture to update the sidebar one. 
frosted glass spray paint words mirror
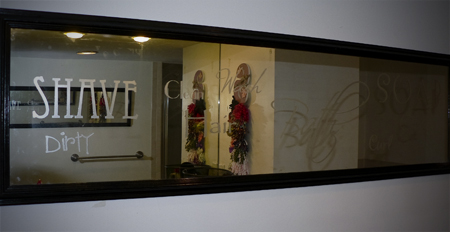
It's a smallish basement bathroom so it's hard to get a good angle for a good picture.  You can't really see the writing, but I LOVE it!  It makes the room feel bigger having a mirror on both sides of the room.  And it's super fun having these bathroom mirrors. 
mirror bathroom words frosted glass finished